Skip to content

Eventzil.la: Session Assets

Target audience: Online conference presenters, attendees, and organizers

Online conferences, and the presentations that they are composed of, are fundamentally different than the traditional face-to-face model. However, most presenters have yet to completely adapt to this change. This brief post will point out how conference stakeholders can benefit from one feature of the Eventzil.la conference package: Session Assets.
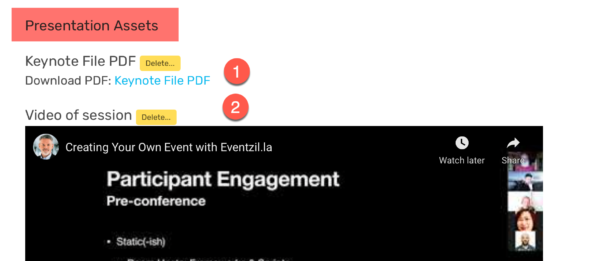
Session Asset Featured

Firstly, what are Session Assets? Session Assets are files, or information, which presenters can add to their Eventzil.la Session pages. These Assets can include, but are not limited to, embedded recordings of the presentation, PDF handouts, presentation slide files, contact information, and links to feedback forms. This allows presenters to ensure their content is available to reference, to continue the interaction with their attendees, and  extend the reach of their content to a wider audience.

From the perspective of the conference attendees, it allows them to learn more from the conference. How many times have you been at an academic conference and found yourself deciding between two or more concurrent sessions? In the end, you must choose one over the other(s), and many savvy conference-goers may jot down the name of the presenters they had to miss in hopes of catching them later in the lounge or networking party. However, many of these opportunities are simply lost. However, if all presenters make full use of Eventzil.la’s Session Assets, attendees can refer back to the missed presentations, perhaps watch a shared recording of the session, download the presentation materials, and even use the contact information to follow up with the presenter. This is something that was much more difficult in the past, as very few people record video of their face-to-face conference presentations. In the current online climate, this is as simple is clicking a button to do, so there is little reason not to record your sessions. Sharing the recording as an Asset to your conference Session is just as simple.

The benefit to the conference hosts also cannot be ignored. The use of Session Assets, as explained above, simply extend the reach of all the content shared in the conference. In this way the hosting association benefits in that attendees get more value for their participation. Not only can they attend the live sessions, that were their ‘first choices’, but they can go back at their leisure to asynchronously attend their second, third, and fourth choice sessions.

Online conferences are, simply put, better than face-to-face conferences in some ways. Specifically, as this short post argues, the use of Session Assets adds increased value to all conference stakeholders. If the adaptation of Session Assets becomes normalized by presenters at online conferences, all will benefit from the increased access to quality academic content online.

How to add Assets to your conference Sessions:

First, a quick definition of terms used on Eventzil.la may be useful.

  • Session: All presentations, workshops, keynotes, posters, and events scheduled on Eventzil.la are referred to as Sessions.
  • Presenter: A presenter is an Eventzil.la member who is assigned to a Session.
  • Assets: Files or text added to a Session. These are used to allow for the sharing of presentation materials in addition to the required Abstract that all sessions include.
Session Assets
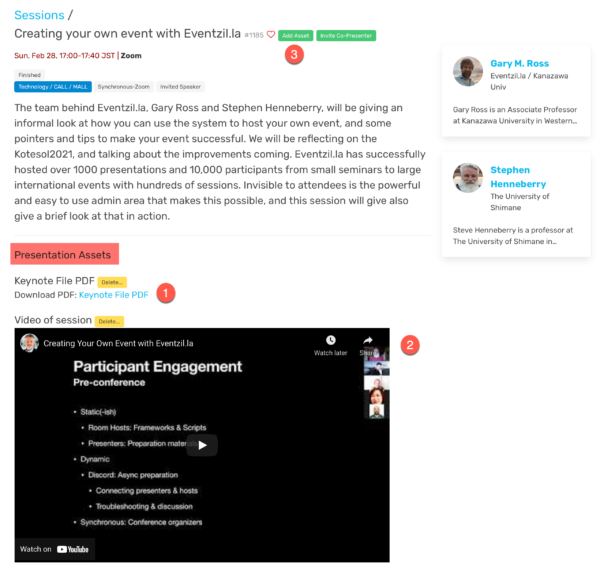
Session with Assets added

In the image above is of a Session, with two presenters, from KOTESOL 2021. In this image you can see that the session includes the time and abstract, which are included in all Sessions, and two additional Assets. The first asset (#1) is a downloadable PDF of the presentation slides, the second (#2) is an embedded video of the presentation. At the top of the image you can also see the number 3. This is the link you use to add Assets to your Session. (Of course, you can only add Assets to Sessions in which you are a Presenter.) If you click the “Add Asset” button, you will see the following screen:
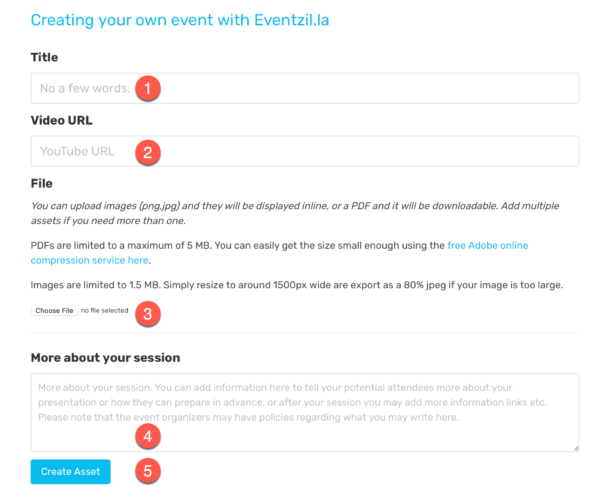
Adding an Asset
Adding an Asset

In this screen you can add a (1) title for your new Asset, (2) a URL if it is a YouTube video, (3) choose a file for upload, and (4) add more information about your session. This extra information is a good place to share replies to questions fielded during your presentation, or to provide greater context. (Currently this section is plain text only, so URLs will not be parsed to clickable links.) Finally, simply click “Create Asset” to add the Asset to your Session.
Line Official: Students actually get the message

This is a post to support my presentation at JALT 2020, on Saturday, November 21st, at 18:30. Once the presentation video is available it will be added here, along with my Keynote PDF and additional notes and links.

Keynote Title page
Keynote title page

Folder Sharing Via Google Drive

If you are using iPads with students in the classroom, and students are submitting iPad created content for evaluation, then you should have a look at Anthony DiLaura’s Youtube video below. Anthony describes how he uses Google Drive with his students for managing portfolios. It seems like a nice solution. Just make sure your students don’t forget to put their names and/or student numbers in their file names.

What do you think? How would you improve upon Anthony’s system?

Swipe to Agree

One of my small tasks related to managing our iPad program is to set up the devices, including such things as wallpapers and lock screens. When considering options I kept two main ideas in mind:

  1. The backgrounds must be simple enough not to be a distraction.
  2. The backgrounds must be iconic and specific to our university.

So, before the iPad meeting today I went out for a walk and took some pictures.

The plan was to get a nice shot of the monument on campus, and then perhaps a close-up of the iconic tile walls on campus. The use of each is planned out below.

I wanted the lock screen to be immediately identifiable on sight, while also serving another important purpose. I wanted to incorporate a “Swipe to agree” statement to remind users of our iPad usage policies. (Continued)

2011 Presentation Wordcloud

I was just updating my portfolio website, and I decided to create a visualization from the summaries of my conference presentations for the year. I gave nine presentations last year. I travelled across three of the four main islands of Japan, Okinawa, Korea, and I even spent some time in France. It was a busy and exciting schedule.My plans for 2012 are not as exciting, but I have already presented in Hiroshima and Nishinomiya in the past two months. I have a few more conferences scheduled in Japan, and even a trip to a conference in Russia on the books for November. I am looking forward to another rewarding year of academic presentations and discussions.

Zaggonit

We recently purchased 40 iPads for our university Media Center (a.k.a. ‘the library’), and I have been tasked with their management. We only have 30 remaining on our campus, as two sets of five were sent off to our other campuses, but that is still plenty for a small school like ours. We currently have ten black third generation iPads, fifteen black iPad 2s, and five white iPad 2s.

While I have been working with one of the third generation iPads for the past week in order to select apps and such, I have quite enjoyed the natural feel of a naked iPad. I have always been a bit odd about protecting my screens, and actually went as far as to use my iPad 2 in the film it was shipped in for a few days while waiting for my screen protector to arrive in the mail. However, while I have been quite cautious with the screen, I do not feel as confident that all the users who follow me will be, so I spent my morning installing Zagg screen protectors on 30 devices.

Of course, I had some students do some of the work as well…

(Continued)

Book Group Day

Book Group Day

An exploration through sharing

While this is not really an EdTech lesson, I thought that I would share this lesson here nonetheless.

I have always been a firm believer in the power of Extensive Reading (ER). At our university we have an ER program integrated into our curriculum. More accurately, it is an SSR (Sustained Silent Reading) program, and one of the big questions is always:

“Are the students actually reading?”

While there are some great solutions out there, such as Moodle Reader, I have always shied away from quizzing students on their ‘pleasure reading’, as I did not want to taint the practice with the idea of assessment. Of course, there must be some accountability, but I have always tried to allow the students to demonstrate their progress in ways that involved sharing and creativity. This is why my central ‘assessment’ of our SSR program is Book Group Day. It is an activity that I often squeeze in between units in a textbook to give the students a change of pace.

Book Group Day is an activity which is completely student-centered, and facilitates the discussion and sharing of ER books.

The set-up


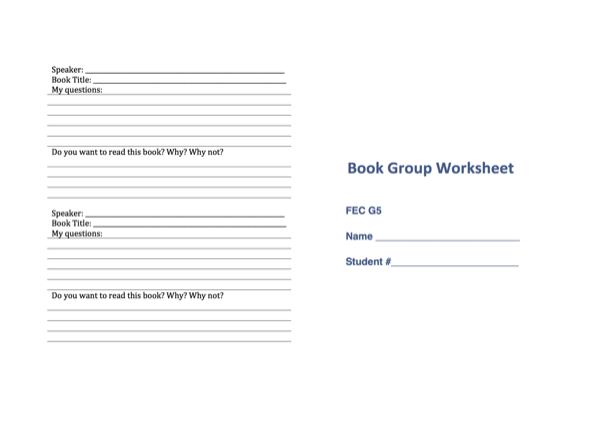
The first step is to prepare the students to succeed in the lesson. During the class before the first Book Group Day, the students are given Book Group Day booklets to use to prepare to share their books with each other. These pages are duplex printed, and folded in half to create a four-page booklet. The first inside page is for the students own ER book, and in addition to the title and author includes three questions:

  1. What was this book about?
  2. What was your favorite part of the book?
  3. Would you recommend this book to a friend? Why? Why not?

BGD Worksheet

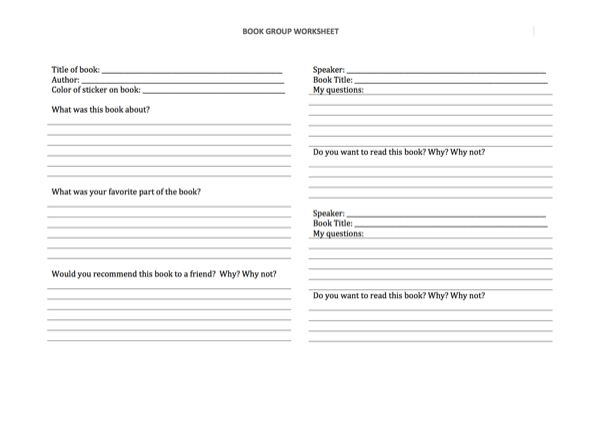
The last two pages include four sections; one for each book shared by other group members. (I usually use groups of four, so there is one extra spot to allow for the odd five-person group.)

BGD Worksheet2

Once the students understand the booklet, and the expectations of their group discussions, they work in groups on the task of thinking of questions to ask about books. The students work together to create a list of questions, which are then shared with the class while the teacher types them into a text file projected on a large screen.

~ I had to sneak some EdTech in there. This was done on my iPad 2, using my Zagg bluetooth keyboard. ;^) The use of the large screen allows students to see which questions have already been shared, which helps to prevent duplication.

The list of questions was later parsed, categorized and printed as a booklet on B5 paper to be given to students on Book Group Day.

Book Group Day

On the day of the lesson the students were immediately put into groups and given their Book Group Day Questions booklets. The students were given a task time limit of 40 minutes, and the teacher posted a digital timer on the classroom screen to keep students on pace. They were given about ten minutes per book, but offered flexibility to account for differences in plot complexity and levels of interest. The students started each ’round’ by introducing their books to the group. Once the student had finished introducing the book, each of the other students were to take turns asking questions about the book. This is where the Book Group Day Questions booklet came in handy. The students were each expected to ask two questions about each book, and to take notes on both the questions they asked and the responses. Additionally, they were tasked with answering a question about whether they would like to read the book discussed.

While not all students remained focused and on task, the lesson generally goes well. The students demonstrate comprehension of the books which they read by summarizing them for their peers, they share opinions about their books, the plot, and the characters, and they learn about interesting books from others.

This is a great activity for taking the primarily receptive task of reading, and making it a four-skills activity.

  • Reading: Students must read a book to complete the Book Group Day booklet.
  • Writing: Students must write short summaries and ideas about the book.
  • Speaking: Students must introduce their book to their group. (Special stress is put on the importance of eye-contact to keep students from simply reading their responses from their booklets.)
  • Listening: Students ask questions about each book, so they must listen to prepare their questions.

What do you think? Is there room for Book Group Day in your course?

Download YouTube videos on your iPad

Have you ever found the perfect YouTube video for class, only to realize that you do not have an internet connection in the classroom? Or, worse yet, the promise of a LAN or WiFi connection, but insufficient bandwidth to stream videos for your students. I know that I have been stuck up at the podium stalling for time more than once while students stared expectantly at a ‘buffering’ message…

Well, there is an easy solution to that. Rather than go to your desktop or laptop to download the video, only to struggle to find a way to copy it to your iPad, just open up YouTube.com in iCabMobile. iCabMobile, in case you have not noticed from previous posts, is my go-to browser on the iPad. One of the reasons I love it is that it allows for file downloads. This includes YouTube videos as well.

Watch the video below to see how it is done.

Homework: Download this video with iCabMobile and share it with your colleagues. ;^)


iCabMobile to the rescue

The problem: You need to share a file from a secure server with a colleague, but it is too large to attach to an email and you only have your iPad.

The solution: Download the file with iCabMobile, upload it to Dropbox, share a link via Mail.

The context: I am on the road with my family, with only my iPad, and a colleague needs a backup copy of my Moodle course right now. He does not have access to the server, so I need to download the file and send him a copy. Easy enough to accomplish in my office, or at home, but a bit more challenging when speeding down the Keiji Bypass in Kyoto.

I appreciate a good challenge, so I sent a mail to explain the situation and promise that I would work it out. After my experience using iCabMobile in the classroom the other day, I knew that it would play a central role in the solution.

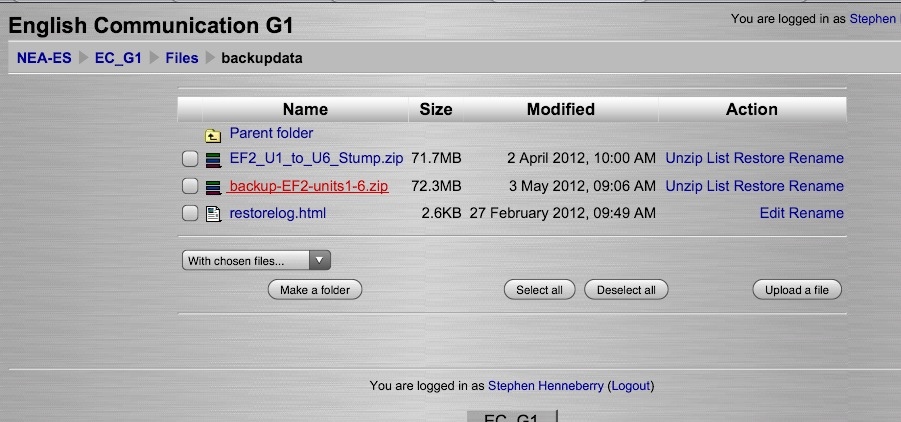
The first step was to log in to my Moodle course using iCabMobile and create the backup. The backup process is all run server-side, so doing this from an iPad is no problem. Dealing with the file once created was the issue…

As you can see in the image above, the file size, while only 72 MB, is still a bit large for a quick download and email. Tapping and holding on the link to the file brings up some options.

Fun folder names

One of the added perks of the variety of international keyboards available on the iPad, is that you can have some fun with your folder names. You can choose from foreign languages (I have used Japanese for work-related and Japanese study folders), Emoji, or even Kaomoji. This is exactly what I was playing with this afternoon (instead of completing that pesky grant proposal).

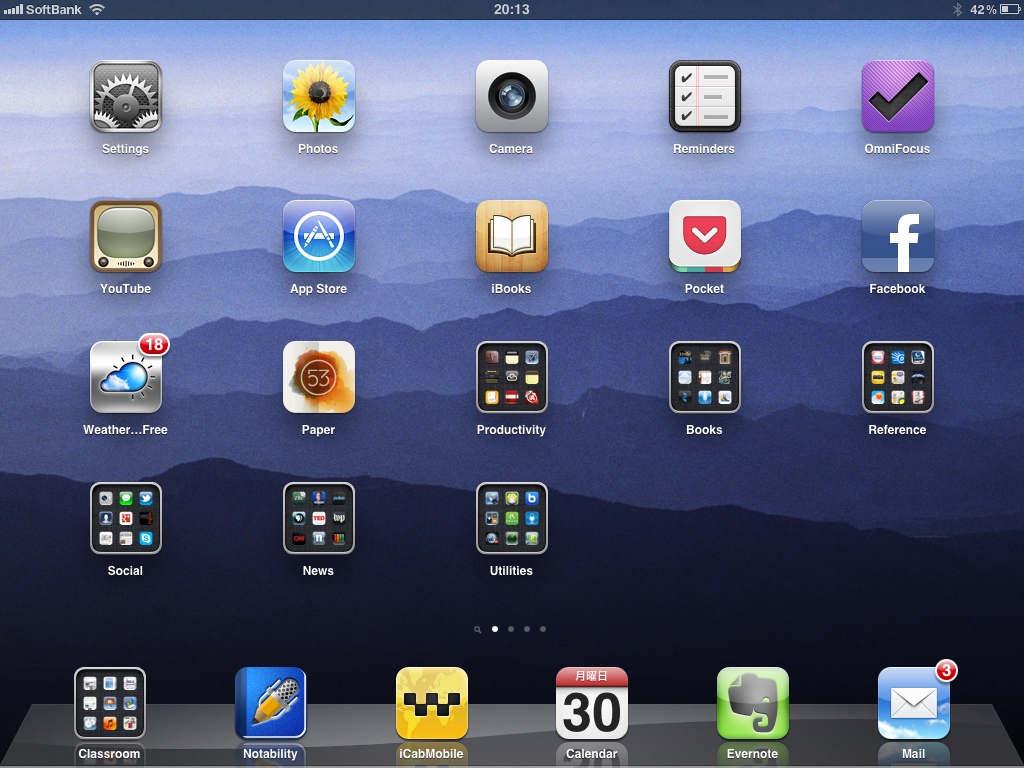
So, this is what my homescreen looked like before having fun with the folder names.

After taking this screenshot I tapped the Settings app up in the right corner to check that my keyboard settings included “Emoji” (General / International / Keyboards: Emoji).